Showing posts with label home. Show all posts

Tuesday, January 24, 2012

We are at it again

We bought this home when I was 6 months pregnant with my daughter.  She is now 2 years old.  In about three years we have managed to make over a dozen updates to our home and continue to work on it weekly.  As rewarding as it may be sometimes it feels like we will never stop working on our home.  Not to mention that having 3 children makes it hard to get much done around here but we do what we can, when we can.  Our last big project was the main bathroom in our home.  You can read about that here.

The truth of the matter is that we actually really enjoy (most of the time) remodeling our home and making it "ours".  A few months back we talked about making some updates to our kitchen but then as usual we got very busy and it was put off.  It wasn't until we had a dishwasher leak that required all new flooring that we realized that NOW is the time to work on the kitchen.

Cue....our next project.  The kitchen.

I'm gonna attempt to blog about the whole process.  I can't make any promises but this is my goal.  I'm often asked how we did something when it comes to remodeling and I find that many people think many simple projects are 'too big' or 'too hard' for them to do themselves so they put it off unti they have the money to pay someone and then it often doesn't get done, right?  Been there.  But have no fear.  If we can do it, so can you.

So let's get started.  Here is our kitchen before we moved in.  The previous owners' style was a little out of date for me but they kept a very tidy and clean kitchen.  Very impressive.

Here are two more views.


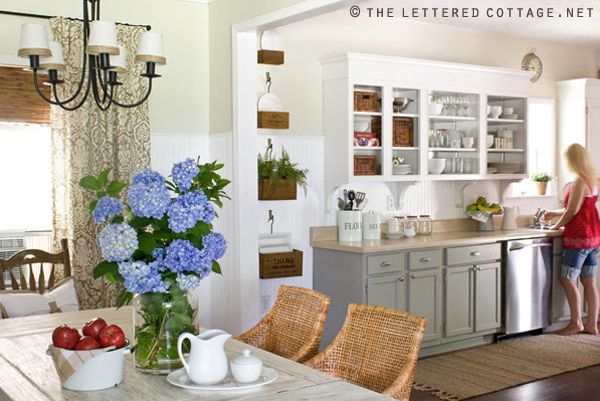
And here is our kitchen now.  As you can see we have already started some work (like removing some end caps at the end of the counter).  We also replaced all of the appliances.  I wish my counters were as clean as the previous homeowners. (sigh)

So there you have it.  The beginning of our kitchen remodel.

Thursday, December 22, 2011

Christmas 2011

Every year I like to post pictures of our home all Christmas"ed" out.  Unfortunately this year I wasn't able to go all out because we had to replace our floors due to a water leak.  In fact we are still installing the baseboards but at least our flooring is in and it's quite beautiful. 

We hardly have any snow this year.  Just enough to dust the trees until it melts (but I'm not complaining at all).  So here is the front of the house as you enter our main front door.  I'll avoid any snowless brown grass photos for you.  My mother in law and I made this garland many years ago and it's held up so well.  I strung lights on it this year and put it around our planter box.

The snowmen wreath is a University of Arizona wreath which my husband loves to display.  If he had it his way our whole home would be decorated in Arizona Wildcats stuff.
So come on in...
(I made this rag wreath with scraps from a quilt I made the first year we lived in North Dakota.)

The entrance is simple but I love it.  My son made the green wreath on the left.  I'm all about homemade decorations.

And continuing on to our dining area.  On the left we have our Christmas cards on display.


If you sent us a card, then it's on display here.


We love Christmas cards!

I love this little snowman.  He makes an appearance every Christmas.


And into the living room where the stockings are hanging above the tv (since I didn't finish my stocking holder I started this year, shocking...I know).  I don't know why this picture came out crooked.  I'm thinking I was trying to avoid a dog or child from being in the photo. 

They love to sneak in my pictures.
(we watch Elmo daily)

And last but certainly not least...our tree.

It looked so much nicer a few weeks back when I first put it up.  The kids decorated it and did a great job BUT over time my darling 2 year old daughter has added and removed so many ornaments that it's looking a little sad these days.  But at least it's still standing.  I was certain that it was gonna get knocked over a few times.  lol

Well, that's it for us.  I've actually enjoyed keeping the decor simple this year.  Have a
Merry Christmas!

Saturday, October 22, 2011

as if I have the time

I'll start this post off with a cute baby picture.
It's weird to say that he's now almost 8 weeks old.  Weird because it seems like we just brought him home but at the same time it's like he's always been a part of our family.  Does that make sense?

I am extremely busy these days with my three kiddos and feel like I spend all most of my time changing diapers and nursing the baby.  I keep reminding myself that soon enough he will be older and I will sleep again and hopefully have some time to do something other than change all these diapers.  After explaining how busy I am these days it's gonna sound crazy for me to now mention that I want to update our kitchen/dining area.

You see it all started when we bought this new dishwasher.

pretty, huh?

Our old dishwasher was on it's way out and when this dishwasher went on sale a couple weeks back we took it as a sign and jumped on the deal.  I'm excited to say we have now replaced all the appliances in this house.

Ok. so back to my never ending story...
 Getting a new dishwasher had me thinking it was time to start  thinking about finally updating our kitchen.  I wish I had a current picture handy of our kitchen but I have a sleeping baby in my arms and won't be getting up anytime soon.  Nothing super major but just some fresh updates to make it ours.  I was thinking some new paint on the cabinets, new lighting, some curtains, new dining chairs, and maybe a new countertop.  And then I came across this picture.


And I heard angels singing. 
Ok, there were no angels but I fell in love with this kitchen from the blog the lettered cottage.  I love so much about it that I don't want to waste your time breaking it all down.  I shared it with my husband and he didn't object loved it too so it looks like we are gonna use this picture as our motivation for some of our kitchen updates.  There are a few things I'd change so that the kitchen flows more with the rest of the house though.  Probably use some darker colors that match our rung under our dining table giving the kitchen a warmer feeling.

So there you have it.  My post about a beautiful kitchen update that I may never have time for but enjoy dreaming about anyways.

Friday, July 29, 2011

a shared room

When we found out we were having a baby boy we had some serious thinking to do over the bedroom situation in our home.  We have an extra bedroom BUT it's on the opposite side of the house and I like my kids all sleeping near my room at night in case of an emergency or something.  Yeah, I'm kinda crazy like that.  And the extra room is about half the size of my kids' current rooms so we would be downsizing furniture and more.  Oh, and did I mention that my kids when babies, rarely sleep in their own bed.  My toddler is still snuggling with me at night. 

So it was an easy peasy decision to keep all kids on one side of the house and make two kids share a room.  I figured that since my 7 year old son is the only kid who actually sleeps in his room and sleeps through the night (not to mention he has school and doesn't need to be woken up by a baby at night), that he would keep his room to himself.  He was kinda bummed though.  He wanted to share with the baby.

This is the only photo I can find of my daughter's room before we started turning it into a boy/girl shared room.


We painted the pink room a neutral green and pulled the crib none of my kids have ever actually slept in back out of storage and set it up. 


I made a few little decorations and a simple mobile to go over his crib.  I kept it simple. 
 I may add a pillow or another pop of color though.


The baby boy has the left side of the room and my daughter has the right side.  Behind his crib is a little toy/ cubby nook where each kid has a few shelves and toy bins.
I bought a super plush crib sheet hoping it may help the baby love napping in his crib.  You can buy one here.


I attempted t o get a good picture of my daughter's side of the room but the kids were having so much fun playing that I didn't want to shoo them out of the room.  As you can see it's still a work in progress (like much of my home life).  I need to figure out window treatment and some wall art still.

My kids love playing with the baby's car seat, swing, and well all his gear.
I know I am a bit biased but they are the cutest kids in the world.

Tuesday, July 12, 2011

We've been featured!


I am excited to announce that our recent bathroom remodel has been featured on the fantastic blog the Remodelaholic.  If you are stopping by from Remodelaholic to see the bathroom remodel post you can find it here.  I will try to update the orginal post with any answers to your questions that come up.  Thanks again for stopping by!!

Wednesday, July 6, 2011

bathroom remodel photos (finally)

So I have been talking about our bathroom remodel for months and although there are still a few things to complete it's pretty much done.  It felt like it took forever at times.  I think that's probably because my husband and I did it all (with the exception of plumbing and major drywall work).

So here are some before photos from when we bought the house.
And here are some photos after we painted and started the work.


We replaced everything!  The floor, tub (and added a shower head), toilet, vanity, we took out built in cabinets and made shelves and a closet, replaced plaster walls with drywall in some areas, updated electrical, and so much more.  It was quite the project.

I am proud to say that we bought just about everything on sale.  We waited for sales and deals on what we needed and we bought the items as we went.  It took us a little longer that way but we have a brand new bathroom with fancy hardware, granite counter tops, and more and we paid a fraction of the retail cost on it.

Ok, so you waited long enough.  Here are the after photos.

Here is the view as you walk in the bathroom.
 Each family member has their own basket.  I picked these baskets up at Michael's (with a coupon, of course) along with the frames and used chalkboard spray paint on the inside of the frame.  That way I can change them up later with some chalk.
 We framed the mirror and added beadboard half way up the walls. I love the contrast.
 Painting the wood trim on the window really lightened up the room as well.  See our fancy toilet?  It's a dual flushing toilet that saves water.


The medicine cabinet  pictured below still needs a handle but we will raise it up about 6 inches (like we did with other handles in this bathroom) to avoid little fingers from getting into bad stuff. 
Need some toilet paper?
I bought this dual basket set at Pier 1 and I love it.  Totally worth the money.  I could use it in any room if I ever can't use it in the bathroom.


We bought our lighting fixture and pulls/handles on E-Bay.  I love the brushed nickel.  Oh, and the vanity is a taller backsaver model which is such a nice feature (even for my short 5'4'' self).

 How did this picture sneak in there?


And one more for you.
Doesn't look like the same bathroom does it?  We loved our new bathroom and are so glad to finally be almost done.

Edited to add:
The grey-ish paint color is by Olympic in their zero voc line.  It took us a few tries to find the perfect shade so I don't have a exact name for you.  We did however start with the color Quill as our starting point and went lighter.  I do see there are some numbers on the can which I am guessing is the formula.  It's 101-5, 105-30, 107-8

Wednesday, January 12, 2011

i heart valentines

After taking down all the Christmas decor it was nice to have some empty spaces.  It seems like Christmas takes over the whole house and after a month I'm ready to take it down. 

And only a short week or two later I'm itching to start decorating for the next holiday. 
Valentine's Day
I didn't have many V-day decorations so I decided to make some this year.
I decoupaged this $1 frame from Michael's with some scrap book paper my sister picked out while we shopped the Archiver's Scrapbook store in the Mall of America a couple weeks ago.  I love it.  The total cost for this cute frame was less than $2.

Next I just added a red doily to the center frame which brings a nice hint of color to this wall.  Never mind the tiny white spot under the shelf.  We puttied it and need to paint it.
I even decided to pull out the sewing machine (as if it's ever away) and sew up some cute dish towels to hang in my kitchen. 

I used this free pattern to make myself a ruffled apron with some v-day cotton I picked up a year or two ago.
And since it's still FREEZING out here in North Dakota we keep our fleece Valentine's Day blanket my mother in law made us a while back on the couch.  I snuggle with it daily.

  This side table is one of the first things you see when you walk in my front door.  I used my pottery barn vases I showed you how to make here and filled them with conversation heart candy and some pink filler I bought on sale last year.  I also added some heart stringed confetti to fill my lamp.  I love this lamp.

Last but certainly not least I added a few hearts and v-day cards to this open frame.  It's looking a little sad now but I'll add a cute card or two to it soon.


 Well, that's it for now. If you're wondering how our bathroom remodel is going we've got the new bath tub installed now. That cast iron tub was so hard to remove. My husband beat it with a sledge hammer for a good hour.

Look at this monster.


As soon as we get a chance to get into town to buy some supplies we are gonna rip out the vanity and built in cabinets and my husband will be putting in the new tile.   Here's the latest picture with our new tub.  The outside still needs to be drywalled.